标签: Linux

Frame drop on Fedora Linux due to Dual System

Recently installed Fedora Linux on my laptop as a second system after Windows.

Every time when the laptop woke up from the sleeping mode, the frame rate dropped significantly, along with incorrect time display (+10 hours). CPU and GPU uses remained normal, but the animation on GNOME was laggy all the time.

Thought it could be driver’s problem or performance reduce due to battery usage, but it turned out to be the TIMING.

RTC is a hardware component on the PC that stores and tracks date and time even when time is turned off. Unfortunately Windows and Linux used different standard on which time to store inside this chip. Windows stores local time into the chip, while Linux stores UTC0 time into the chip, and then calculate the time shifting manually.

As mentioned before, the laptop was running on Due Systems, which means when Windows was started, RTC time got changed from UTC time into local time. When the system was then switched back to Linux, shifting was added to the local time, causing incorrect timing display.

But how did this shifting of time affected frame rate? When the time shifted for 10 hours, Chrony tried to correct it back. However, Chrony corrects time gradually, not immediately. As Chrony changed software time gradually, Mutter – default window manager for the GNOME desktop environment – started to use wrong timestamp as well, causing wrong prediction on frames, which eventually caused lagging.

To fix this, simply fix the timing.

sudo chronyc makestep
sudo timedatectl set-local-rtc 0

And the frame rates returned to normal 🙂
N100 with Proxmox – Enable GPU for Ollama

Recently deployed Proxmox server to my N100 machine again. Tried running a small LLM inside the VM but got a warning with running with CPU only, therefore tried to figure out how to enable GPU for Ollama under this condition.

N100 Background

N100 is a low power CPU with 6W TDP from Intel. It’s mainly used for a small energy efficient server running in the garage. It also comes with an Intel UHD Graphics built inside the CPU. This type of GPU is not supported by Ollama by default, as using it might not have more benefits than using CPU directly.

Proxmox Settings

In order to get access to iGPU inside the VM, iGPU needs to be passed into the VM through Proxmox.

To achieve this, login in to the Proxmox web management and go to Datacenter > Node > VM > Hardware > Add PCI Device.

Select Raw Device and add UHD Graphics with All Functions selected.

Reboot the VM after adding the device.

Notice the iGPU can only be passed to a single VM in this case.

Ollama Settings

Log in to the VM. Firstly install Vulkan support.

sudo apt install -y mesa-vulkan-drivers vulkan-tools

Then add Ollama user to the GPU groups.

sudo usermod -aG render,video ollama
sudo systemctl restart ollama

Change Ollama’s settings so it does use iGPU

sudo systemctl edit ollama

Make the following changes:

[Service]
Environment="OLLAMA_VULKAN=1"
Environment="OLLAMA_IGPU_ENABLE=1"
Environment="GGML_VK_VISIBLE_DEVICES=0"

(Given device 0 is your GPU)

Finally apply the changes, all done.

sudo systemctl daemon-reload
sudo systemctl restart ollama

Run any model, and then use ollama ps to observe if it’s using GPU now.

Ubuntu 20.04编译安装Deepin深度显卡驱动管理器

获取源码:https://github.com/linuxdeepin/deepin-graphics-driver-manager

安装依赖:

sudo apt install cmake qttools5-dev-tools qtbase5-dev freeglut3-dev libdtkwidget-dev libpci-dev 

编译:

cmake -DCMAKE_INSTALL_PREFIX:PATH=/usr .. # Install to /usr
make # Add -jx for parallel

安装:

sudo make install
sudo systemctl daemon-reload # refresh systemd
sudo systemctl enable driver-installer.service # enable installer service
sudo systemctl start driver-installer.service # start installer service

使用:

sudo deepin-graphics-driver-manager

解决Ubuntu 18.04修改/etc/resolv.conf重启后失效

编辑 /etc/resolvconf/resolv.conf.d/base

写入希望修改的DNS服务器:

nameserver 8.8.8.8

应用更改:

sudo resolvconf -u

解决Unbound报错unknown keyword ‘tls-*’

在配置Unbound时遇到如下错误:

/etc/unbound/unbound.conf:16: error: unknown keyword 'tls-service-key' 
/etc/unbound/unbound.conf:16: error: stray ':' 
/etc/unbound/unbound.conf:16: error: stray '"' 
/etc/unbound/unbound.conf:16: error: unknown keyword 'key.pem' 
/etc/unbound/unbound.conf:16: error: stray '"' 
/etc/unbound/unbound.conf:17: error: unknown keyword 'tls-service-pem' 
/etc/unbound/unbound.conf:17: error: stray ':' 
/etc/unbound/unbound.conf:17: error: stray '"' 
/etc/unbound/unbound.conf:17: error: unknown keyword 'fullchain.pem' 
/etc/unbound/unbound.conf:17: error: stray '"' 
/etc/unbound/unbound.conf:18: error: unknown keyword 'tls-port' 
/etc/unbound/unbound.conf:18: error: stray ':' 
/etc/unbound/unbound.conf:18: error: unknown keyword '853' 
read /etc/unbound/unbound.conf failed: 13 errors in configuration file [1579421749] unbound[17698:0] fatal error: Could not read config file: /etc/unbound/unbound.conf

搜寻后得知是官方文档有变更,将tls全部改为ssl即可。

树莓派WiFi设置静态IP

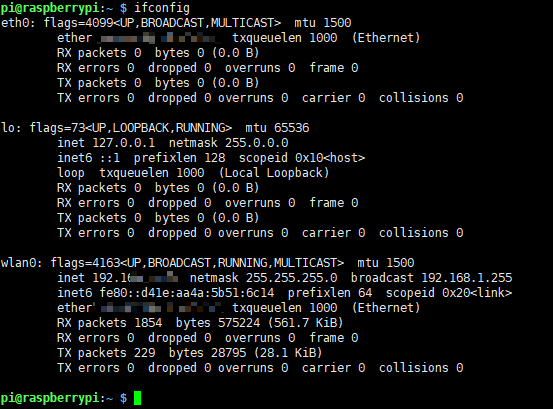
ifconfig查看网络接口:

此处选择wlan0

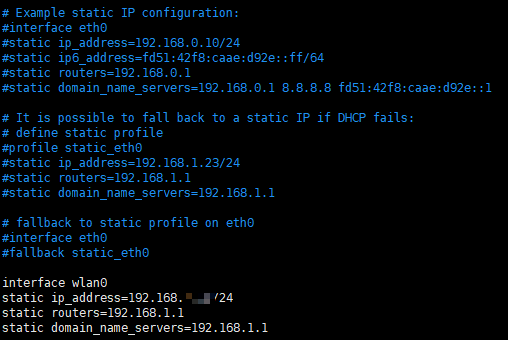
编辑/etc/network/interfaces

修改或添加以下内容:

auto wlan0
 iface wlan0 inet manual
 wpa-conf /etc/wpa_supplicant/wpa_supplicant.conf

注意不能写成iface wlan0 inet dhcp,否则dhcpcd不会生效。

编辑/etc/dhcpcd.conf

在文件末尾添加以下内容:

interface wlan0
 static ip_address=192.168.1.100/24
 static routers=192.168.1.1
 static domain_name_servers=192.168.1.1

修改wlan0为你的网络接口,ip_address为你的IP地址,routers为你的网关,domain_name_servers为你的dns。

完成后重启系统即可。

解决树莓派4b无法连接5Ghz WiFi

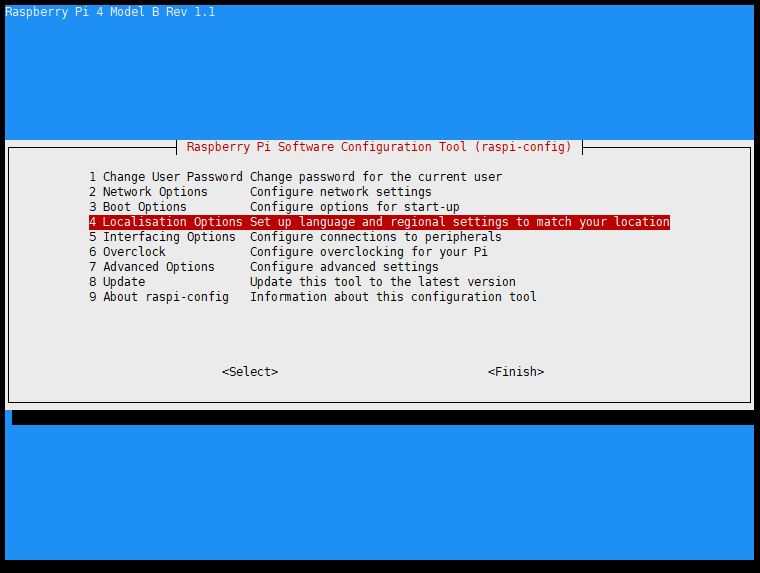
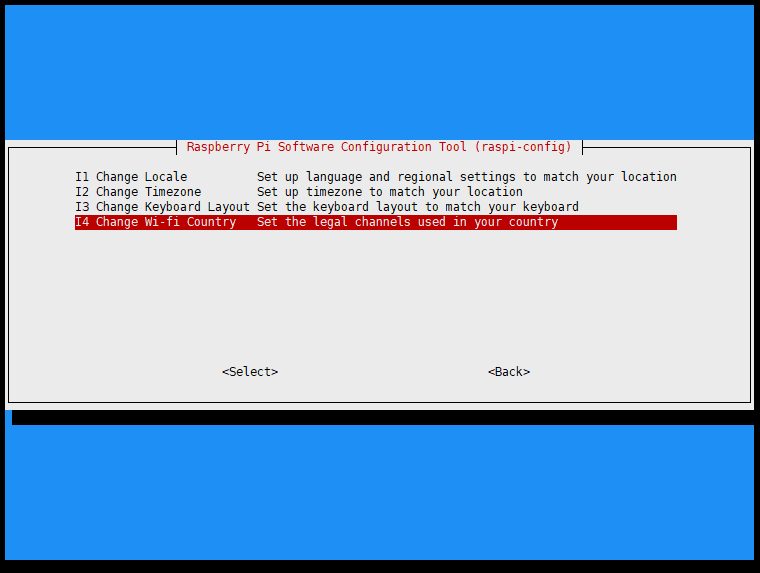
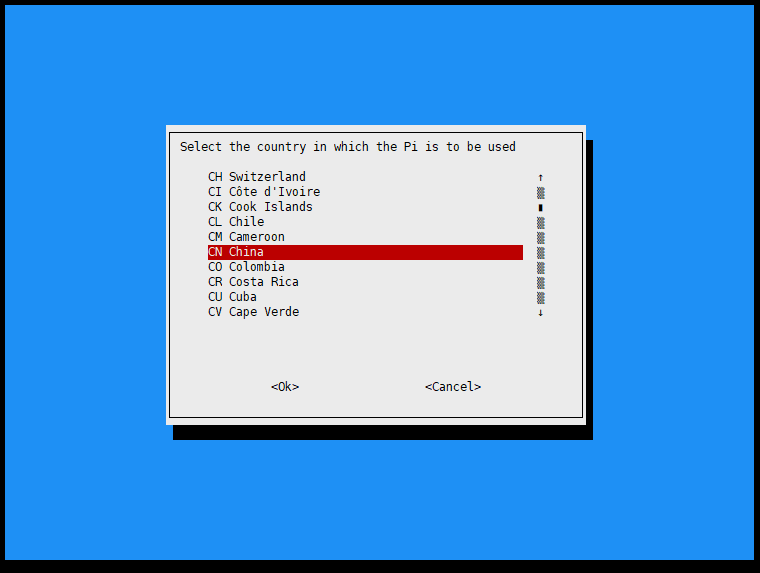
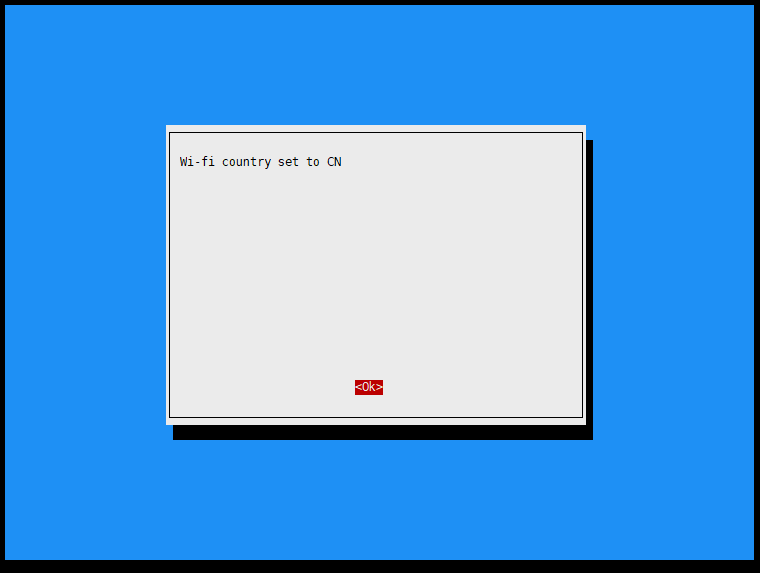
可尝试设置WiFi地区为中国。

sudo raspi-config

即可搜索到地区为CN的5Ghz WiFi。

Linux搭建CS:GO服务器

0.前言

本文用到的系统:Ubuntu 16.04 32位

撰写本文时CS:GO服务端的大小约为16G,请确保服务端有足够空间。

1.安装SteamCMD

Steam命令行版客户端(SteamCMD)是一个命令行版本的Steam客户端。它的主要用途是在一个命令行界面的Steam客户端上安装和更新各种可用的专用服务端。它适用于使用SteamPipe内容分发系统的游戏。所有游戏已经从旧的半条命专用服务器更新工具迁移到了SteamCMD。

为steamcmd创建一个用户并切换过去(root用户下):

useradd -m steam
su - steam

创建目录:

mkdir Steam
cd Steam

下载并解压:

curl -sqL 'https://steamcdn-a.akamaihd.net/client/installer/steamcmd_linux.tar.gz' | tar zxvf -

运行:

./steamcmd.sh

等待下载完成,直到出现Steam>,SteamCMD环境安装完成。

2.安装CS:GO

以下指令均在SteamCMD(Steam>)环境下执行

选择安装目录:

(下面的指令将csgo服务器安装在了当前目录下的csgoserver目录,也就是Steam/csgoserver)

force_install_dir ./csgoserver/

匿名登陆:

login anonymous

安装:

app_update 740 validate

(如果需要升级请使用app_update 740,升级前务必选择安装目录

安装完成后,按Ctrl+C退出SteamCMD,然后执行下面的指令即可以休闲模式启动沙漠2服务器:

./csgoserver/srcds_run -game csgo -console -usercon +game_type 0 +game_mode 0 +mapgroup mg_active +map de_dust2

但因为还未关联token,服务器只能通过内网连接。要想通过公网连接并在社区服务器列表中显示出来,你需要申请一个token并填入启动参数。

token申请地址:http://steamcommunity.com/dev/managegameservers

在上面的指令中追加下面的参数即可在公网中启动:

+sv_setsteamaccount 你申请到的token(登陆令牌) -net_port_try 1

另外附上其它几种模式的启动指令:

#休闲模式
./csgoserver/srcds_run -game csgo -console -usercon +game_type 0 +game_mode 0 +mapgroup mg_active +map de_dust2
#竞技模式
./csgoserver/srcds_run -game csgo -console -usercon +game_type 0 +game_mode 1 +mapgroup mg_active +map de_dust2
#军备竞赛模式
./csgoserver/srcds_run -game csgo -console -usercon +game_type 1 +game_mode 0 +mapgroup mg_armsrace +map ar_shoots
#爆破模式
./csgoserver/srcds_run -game csgo -console -usercon +game_type 1 +game_mode 1 +mapgroup mg_demolition +map de_lake
#死亡竞赛模式
./csgoserver/srcds_run -game csgo -console -usercon +game_type 1 +game_mode 2 +mapgroup mg_allclassic +map de_dust

所有游戏类型和模式都可以在./csgoserver/csgo/gamemodes.txt中找到

3.连接至服务器

开始游戏 – 浏览社区服务器 – 收藏夹 – 添加服务器 – 输入你服务器的公网IP地址

如果是在家开服请自行搜索端口映射相关教程。

4.长久运行

如果需要长久运行服务器,请使用screen。没有安装的可以使用下面的指令安装(root用户下):

apt install screen

在启动CSGO之前运行screen -S csgoserver,然后启动CSGO。接着你就可以关闭终端,服务端会继续在远程服务器上运行。

当你需要操作服务端时,运行screen -r csgoserver,便会回到服务端进程中去。

5.可能遇到的错误

  • Failed to open dedicated.so (libstdc++.so.6: cannot open shared object file: No such file or directory)

需要安装lib32stdc++6包,使用下面的命令来安装:

apt install lib32stdc++6